So the first step is to get an idea of what you want your card to look like. I decided on a red black and white theme of colors. I then picked out the paper and ink's and stamps that coordinated and gathered my supplies. I choose to use a card base ( the white rectangle in pic) that came with envelops ( bought at most craft stores and online) The clear blocks are for mounting acrylic stamps( like the one sitting on one of the blocks) there is a cutout square that I used my Slice to cut, but you could use any die cutting machine. The green tool is called a bone folder and you use it to give you a nice crease when folding or creasing items. At the top of the page the little black things are called daubers and are for sponging ink onto surfaces to add a distressed look. So these are the basic tools I needed.


The two patterned papers I used were from stamping up ( there is a pic later showing that it is two sided), the other papers were some I had lying around. After taking these pics I realized that the striped pattern needed to be flipped over because I was using the other side in my card.
Here are some more pics of the supplies I was using.
Close ups of the Stampin' Up! stamps I was using.
This is the ink and ribbon I was going to use. I didn't end up using the black ribbon.
This patterned paper is the one that was on the opposite side of the striped paper.
The dotted paper had the newspaper type print on the opposite side.
This shows the two sides of the striped paper.
This is the card that came prepackaged with envelopes that I used my bone folder to fold into a card shape.
You would just fold your paper and then press the pointed end of the bone folder along the crease. I actually watched people use them and thought they were a silly tool but when I recently realized I had one in my cricut tool kit ( and when I first got it had no clue what it was for) decided to try it and it isn't so silly it really helps in not crinkling the edge you are folding and gives it a smooth crisp crease.

So this is my folded white card ( base) and I used my paper trimmer to cut out a piece of black cardstock the size of the card but slightly smaller so that I would have a small border of white showing. I suck at math and couldn't think of a better way to do it, but had decided that I wanted to cut two small squares to alternate with the black paper, to give it a quilted type look. And so I just folded my black paper into forths and used it as a guide to cut my two patterned paper down from 12x 12 to whatever they ended up being. So thus you see a folded black paper and two patterned squares.
I wanted my card to have a distressed/ grungy/ worn kind of look so I used my dauber, and inked it with black ink and sponged it around my patterned papers edges.
This believe it or not, is the desired effect.
Some close ups for you...
I then used my ATG gun ( a big adhesive roller gun) and stuck down the two patterned pieces to the black paper.
I decided to add some ribbon( although in the end you don't see it much) just to connect the colors and papers together better and to hide any awkwardness... that is something you can always do with paper crafting, I've learned if there is something you don't like you can stick something or ink on top of it... for example, on my dotted patterned paper there are the words stampin' up! printed on the top corner and so the ribbon covered that up.
So this is how it looks with the ribbon...
You may be wondering.. how do I attach the ribbon to the card? I used to wonder this and learned from watching youtube videos that you simply cut the ribbon long enough that there is a little that wraps around to back and tape it down. Doesn't matter how that side looks, no one will see it, unless they pull your card apart...
So this is where we are now...
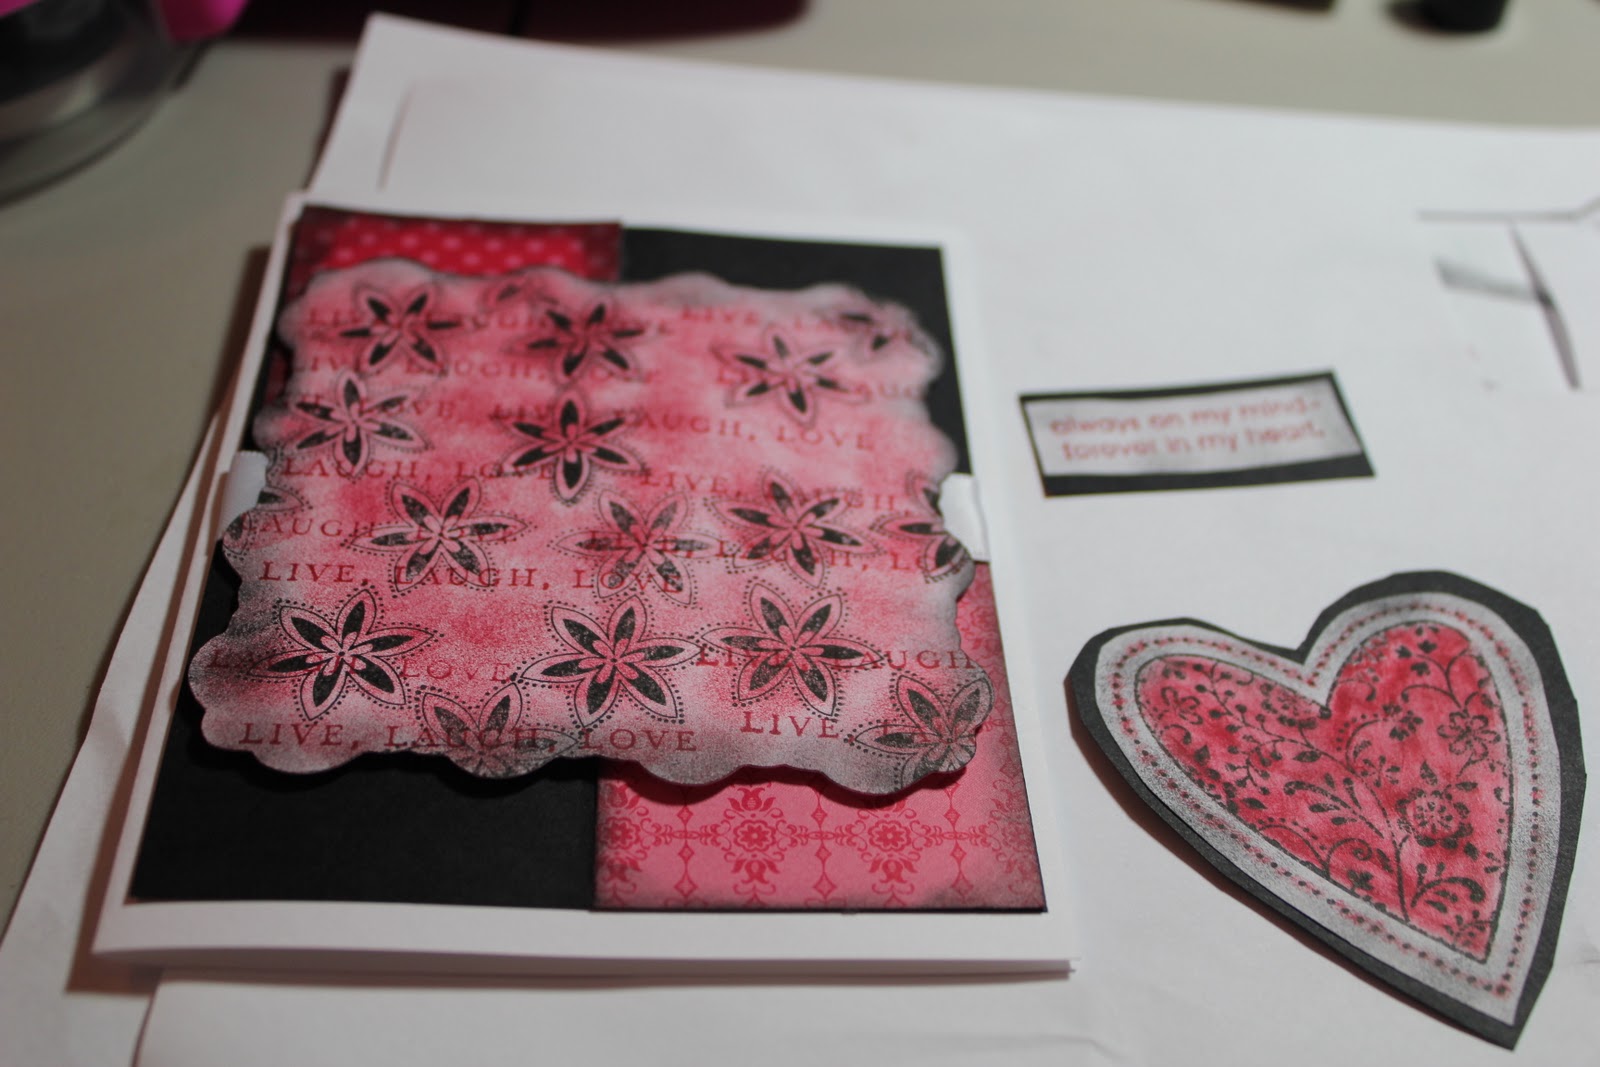
Time to make our own patterned paper using stamps and ink!!! I used the flower stamp and the Live Laugh Love stamp on the little white square. The flower was inked in black and the word stamp in red. I made my own pattern.
This is the resulting pattern from stamping these stamps on the white square.
I decided it needed some color and used my dauber and red ink and colored the whole square in. This you may wonder would cover up the words inked previously in red. This effect is called tone on tone stamping and just adds some dimension to your project.
As you can see daubing is not an exact science and the color is mean't to be deeper in some places and lighter in others... no two projects are alike.
I then took a piece of printer paper and stamped the sentiment "always on my mind- forever in my heart." in read and stamped a big floral heart in black and used my red ink to color it in with a fantastix ( similar to a dauber but shaped like a pencil).
Next I cut the items out of the printer paper.
I mounted them to black card stock
and used black ink to ink around the two cutouts and the white border of the card to carry the distressed look all the way through.
Here is my finished card! Hope you enjoyed this post on how to do various paper-crafting techniques!
Thanks so much for looking, if you have any questions feel free to email me at adrienneclaire86@yahoo.com


Your skills are amazing and this site has the perfect mix of professional and personal touches.
ReplyDelete